Finding it tough to keep track of your team? My.Drewberry is your new best friend.
People come, and people go. They even move around your business in between. As a result, it can feel impossible to keep on top of the benefits admin when you’re doing it manually.
Luckily, My.Drewberry makes everything so much easier. There’s just a few key things that need to happen so we can work our magic. Here’s what you need to know.
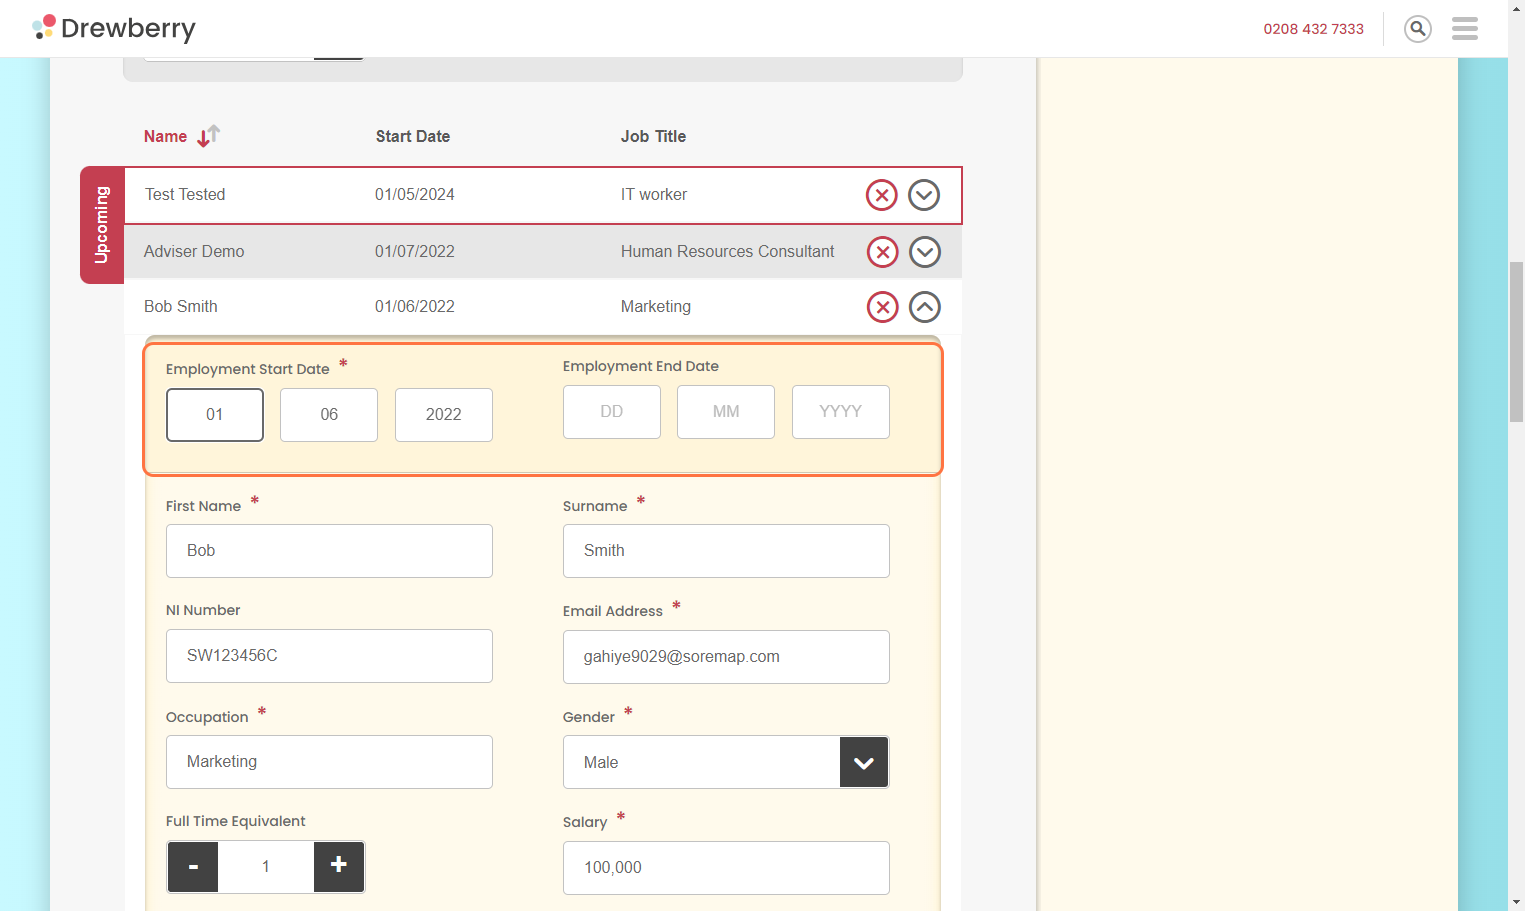
Add An “Employment Start Date”
Each employee record will have an “Employment Start Date” for when that person came on board. As long as this date is added and correct, My.Drewberry will ensure each employee gets access to the right perks, at the right time. Any newly-added employees, once approved, will show up in the “Current Employees” section, where you can make any amends or updates. You’ll get an automated audit trail to help you keep on top of changes. See how to keep employee details updated.
If you have integrated your HRIS, any newbies added will automatically pull through to your My.Drewberry portal. They’ll be assigned the relevant benefits and their record will remain in the platform for as long as they’re employed. Either way, you’ll only have to add new joiners once, and we’ll handle everything with your external benefit providers.
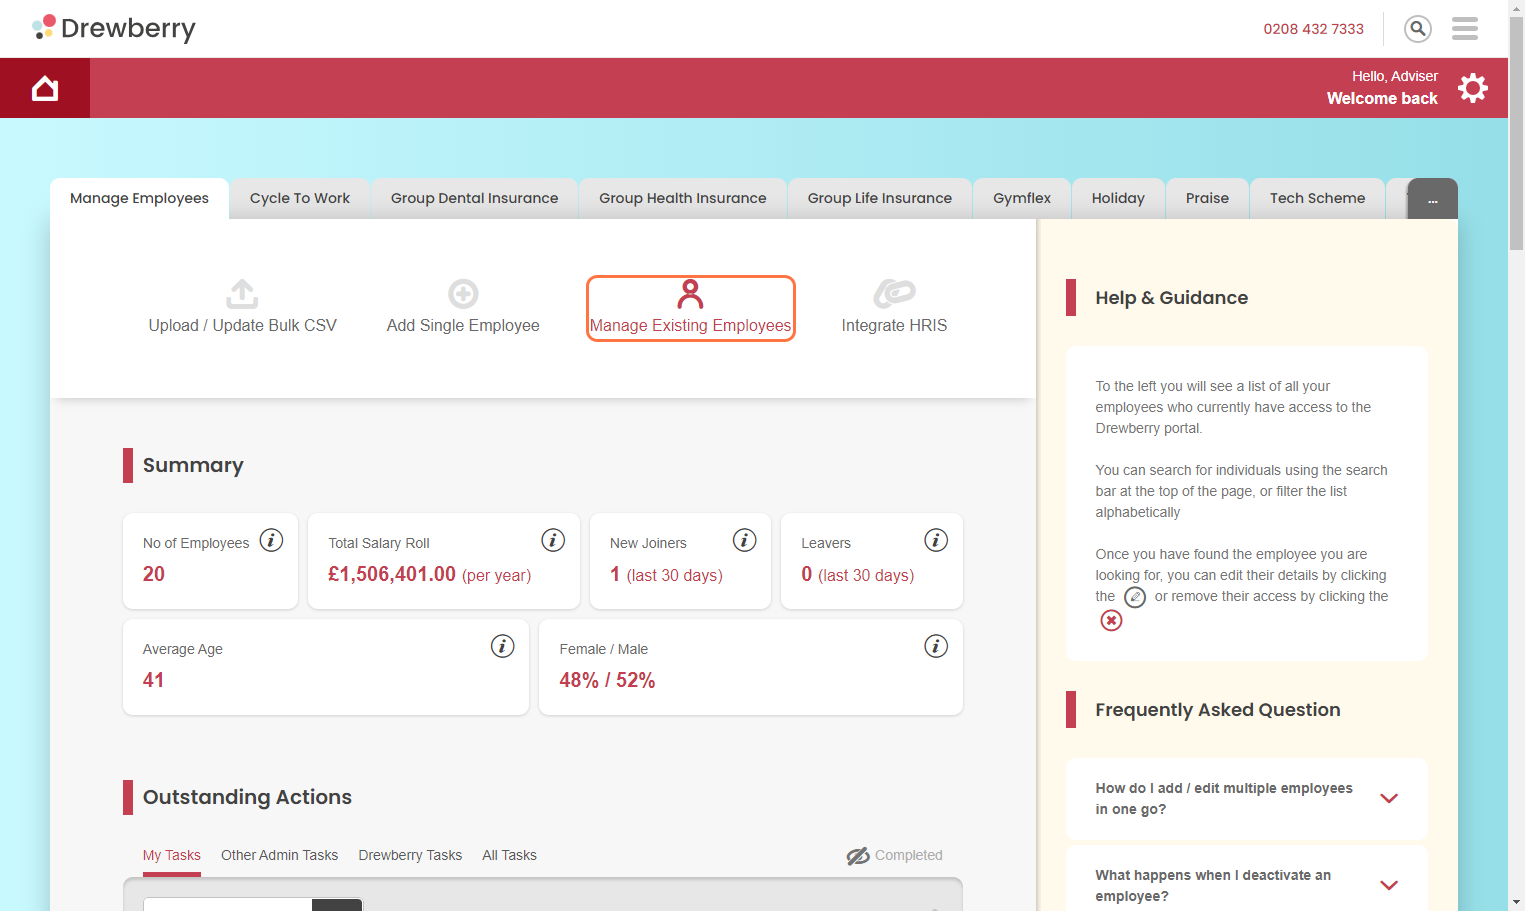
If you’re bulk uploading or adding single employees manually, you won’t be able complete the action without including a start date. To view your employees’ start dates at any time, head to the “Manage Existing Employees” section of your My.Drewberry portal. Scroll to “Current Employees”, and click the grey downward arrow to expand the contact record.
Ensure You’ve Selected The Right “Employee Category”
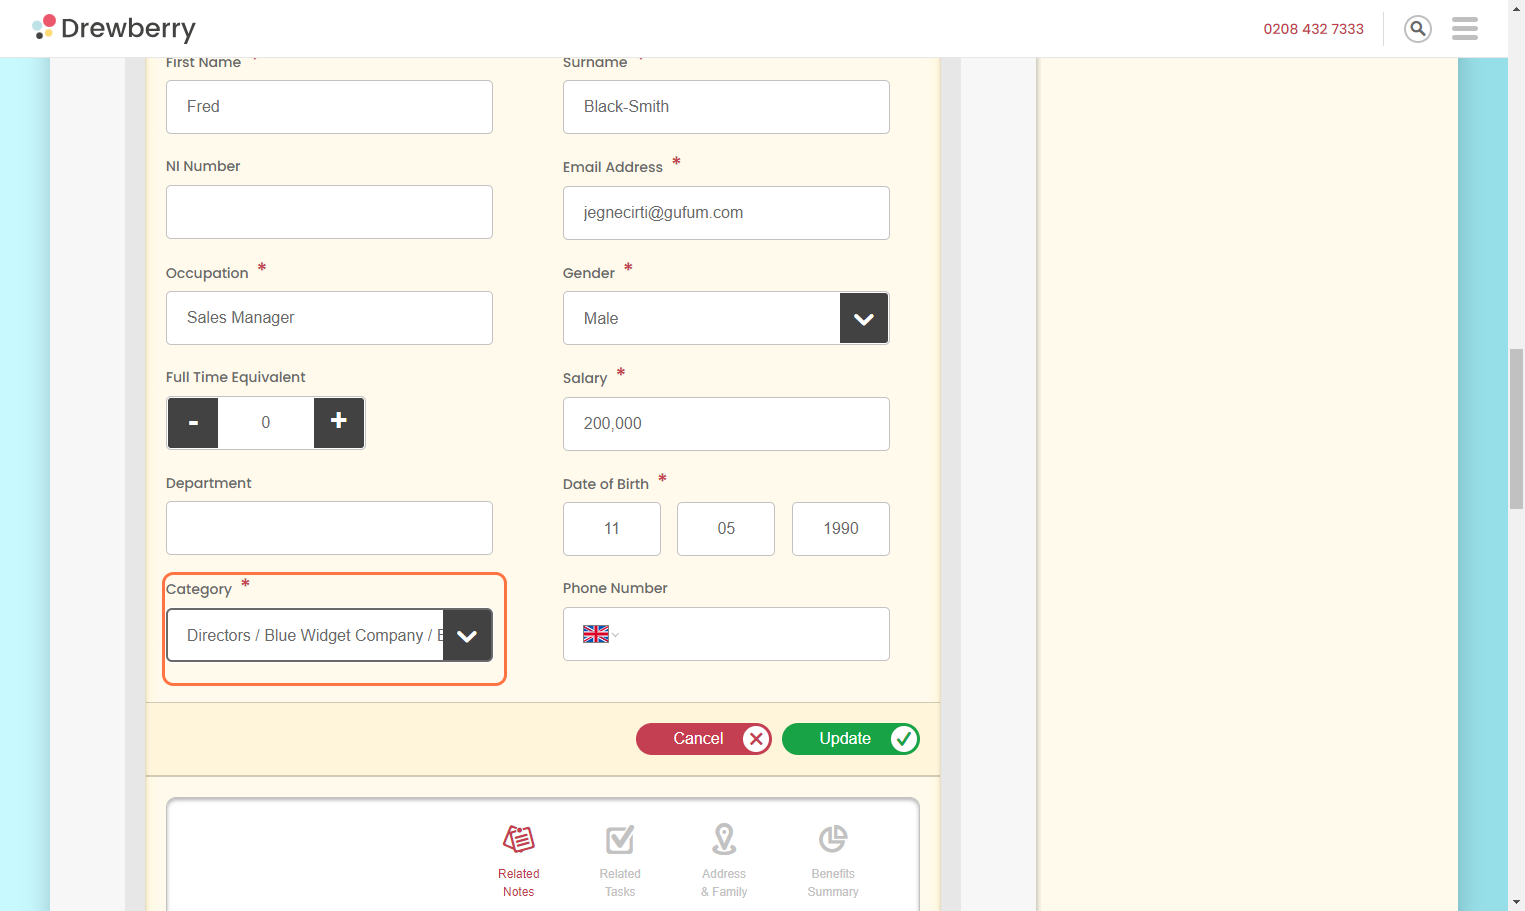
Every employee on your my.Drewberry platform will need to be assigned an “Employee Category”. These categories segment your employees based on the level of benefits they’re entitled to.
For example, you might provide Company Life Insurance to your entire workforce, but Directors might also receive Private Health Insurance. So you’d have a category for general employees, and a category for Director-level employees.
Your Drewberry team will have worked with you to define and set up these categories, so it’s just a case of ensuring the right people are assigned the right category. (Don’t forget to update the records of promoted individuals if they qualify for a new category).
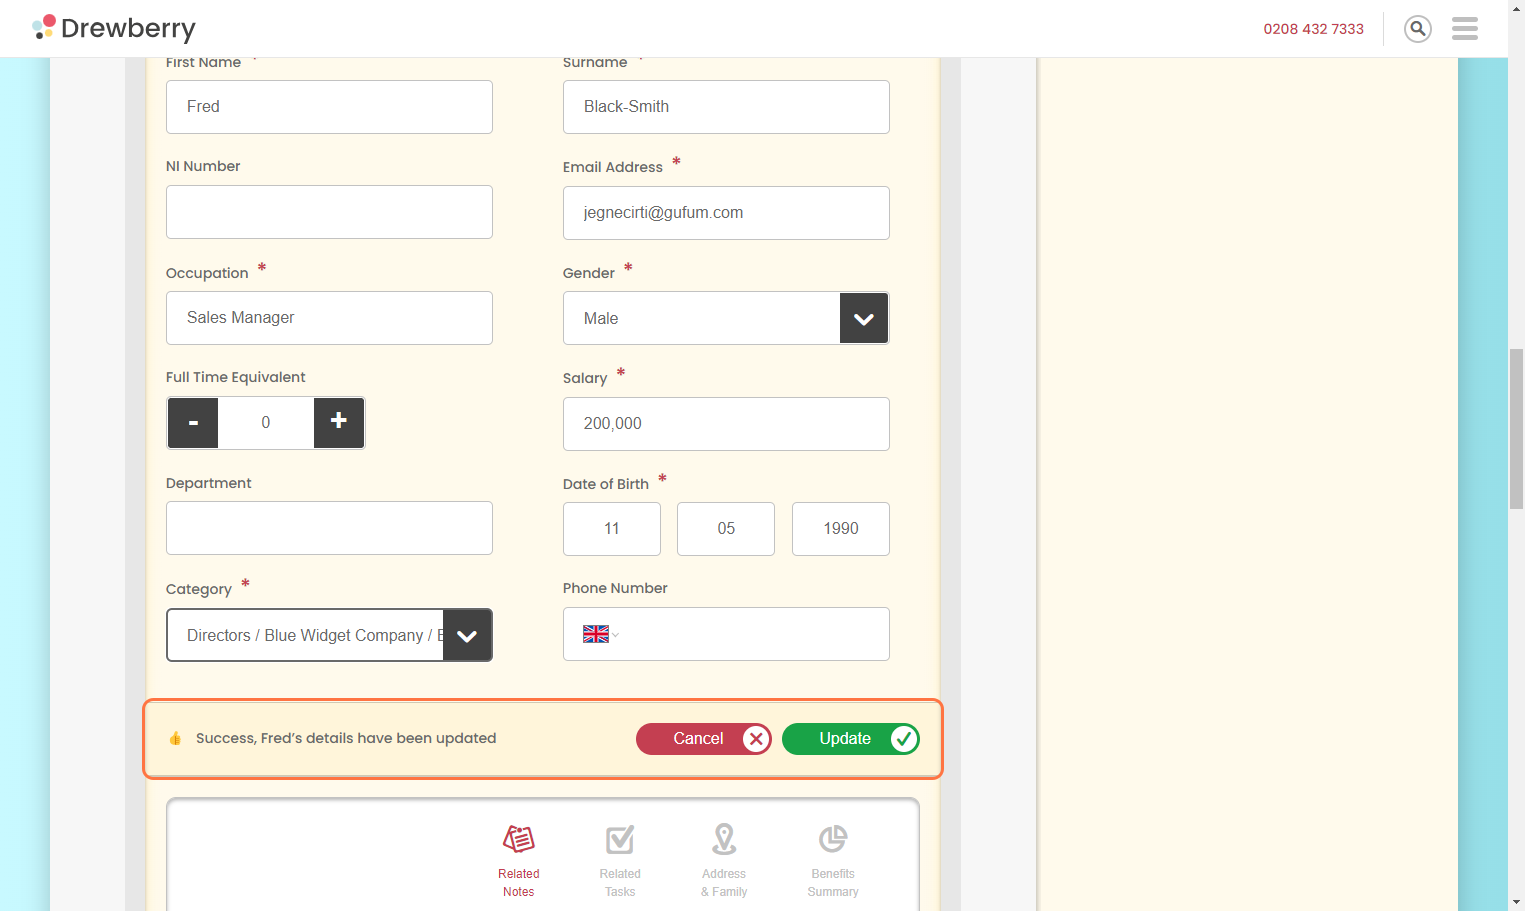
For new employees, you’ll need to select a category when you add them to My.Drewberry. For current employees, head to the “Manage Existing Employees” section of your My.Drewberry portal. Scroll to “Current Employees”, and click the grey downward arrow to expand the contact record. You can then use the dropdown to assign/change a category and click “Update”.
If an individual is added to My.Drewberry via your HRIS integration but doesn’t have a category, a task will be generated prompting you to assign one. Learn more about how tasks work in My.Drewberry.
Add An “Employment End Date” To Outgoing Employees
We’ve spoken to a number of business owners who’ve previously discovered they’d been paying for an employee’s benefits long after they’d left. Not on our watch!
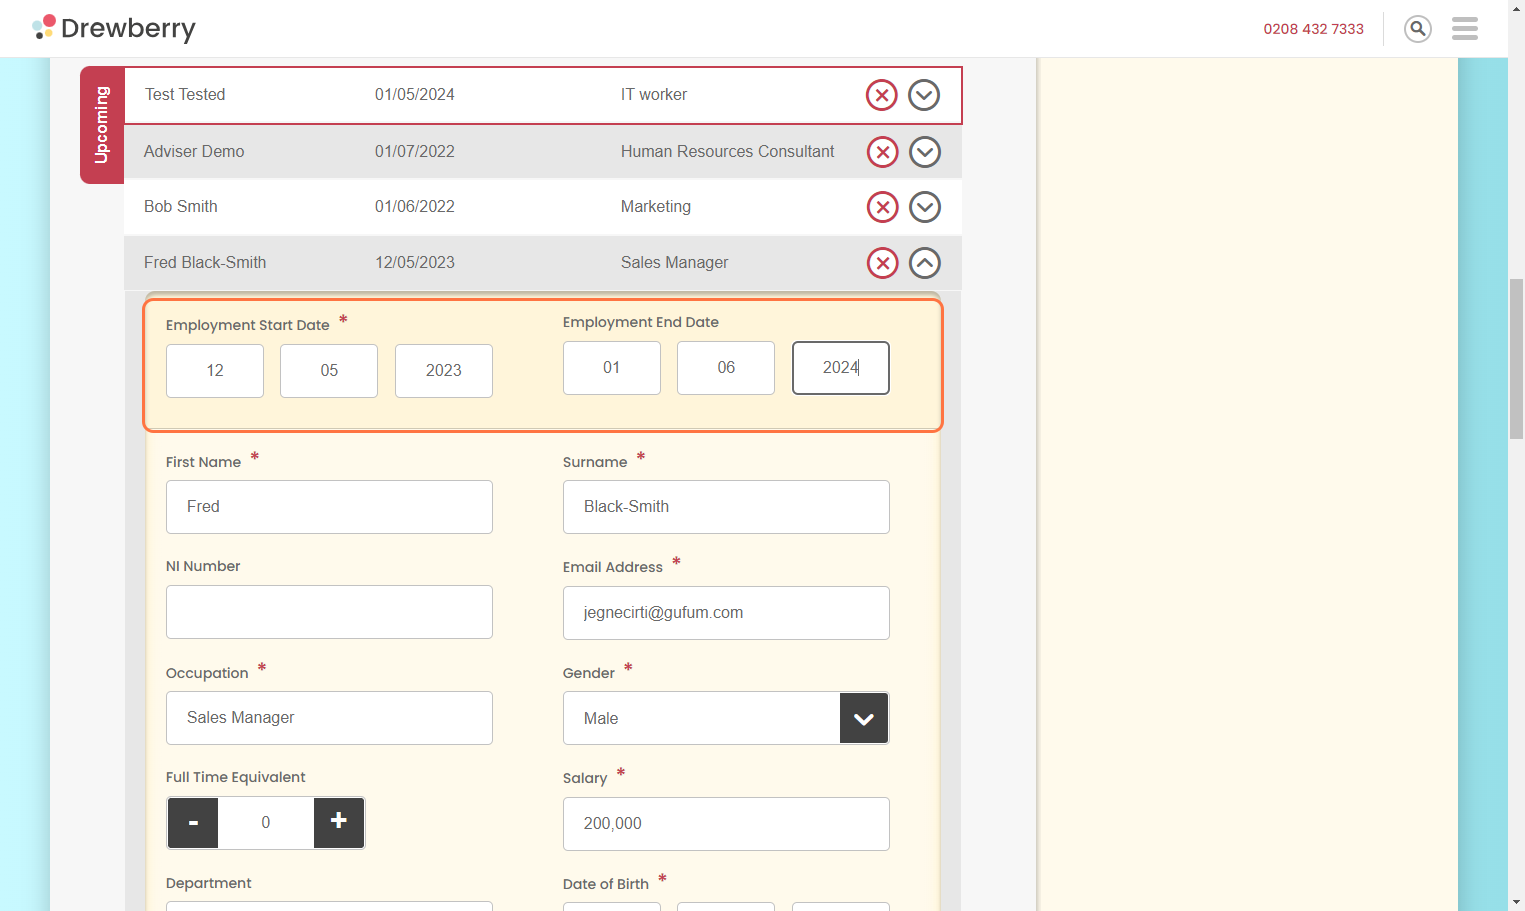
Once you know an employee is leaving, all you need to do is add an “Employment End Date” to their contact record. When this date comes around, the platform will automatically contact your external benefits providers and update the contact record.
If you have an HRIS, once an employee is removed from that side, they’ll be removed from My.Drewberry, too. We’ll let all the relevant benefit providers know so they can update your policy. Job done.
To add an end date, head to the “Manage Existing Employees” section of your My.Drewberry portal. Scroll to “Current Employees”, and click the grey downward arrow to expand the contact record. Enter the Employment End Date and click “Update” when done.
Check Your “Leavers” List
Any outgoing employees will automatically be added to your list of “Leavers”. This can be found under the “Manage Employees” tab, and under the “Leavers” section within any individual benefits tabs.


