Adding newbies to the portal is super easy! Here’s how you do it.
Step 1: Log In To The Admin Centre
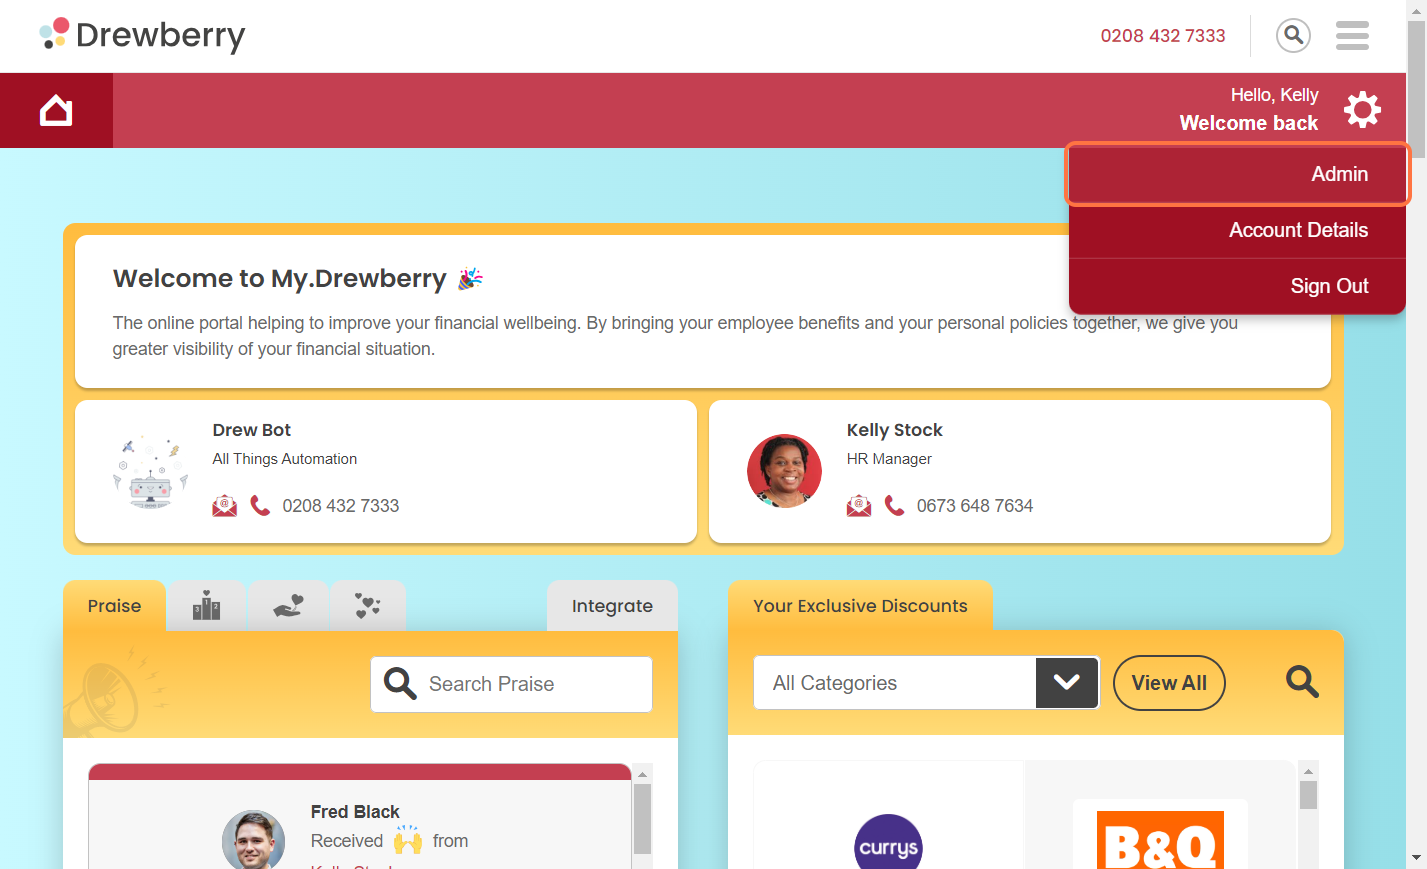
First thing you need to do is head to your admin dashboard. Click the settings cog in the top right corner of your portal. Select “Admin” and you’ll be taken to your employer dashboard.
Step 2: Choose Your Method
There’s three different ways you can add employees to your My.Drewberry platform. The one that’s best for you will depend on your situation. Click on an option to jump to that section.
I just need to add one or two employees (jump to section)
I have a big list of people (jump to section)
I want to sync with my HRIS (jump to section)
Option A: Add Single Employee
Don’t have many people to add? We’ve got you.
Go To “Manage Employees”
Under the “Manage employees” tab, you’ll see the option to “Add Single Employee”.
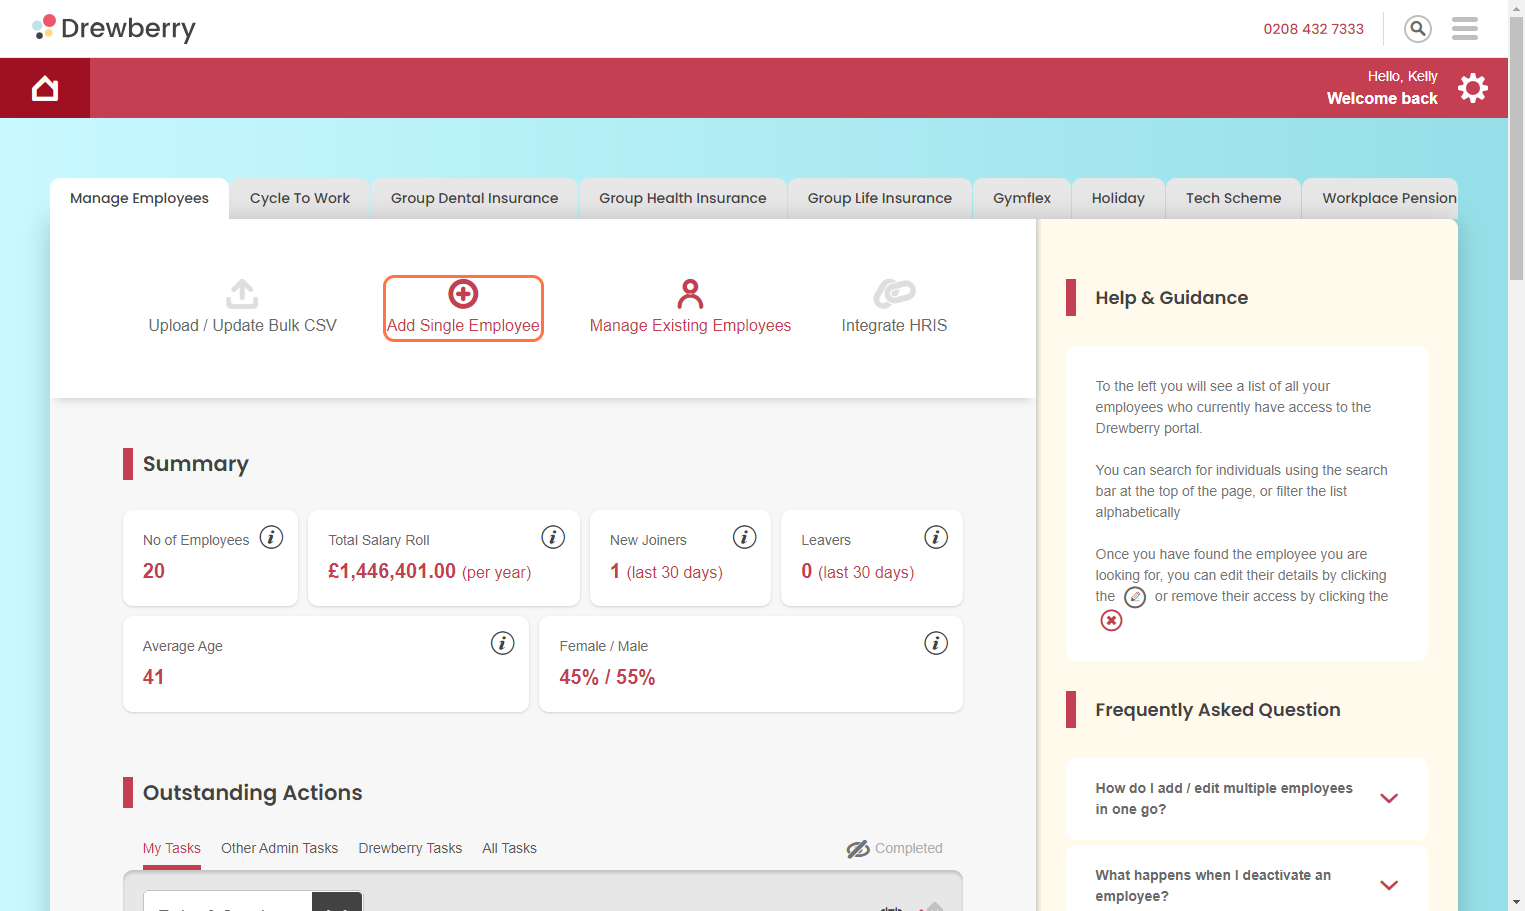
Select “Add Single Employee”
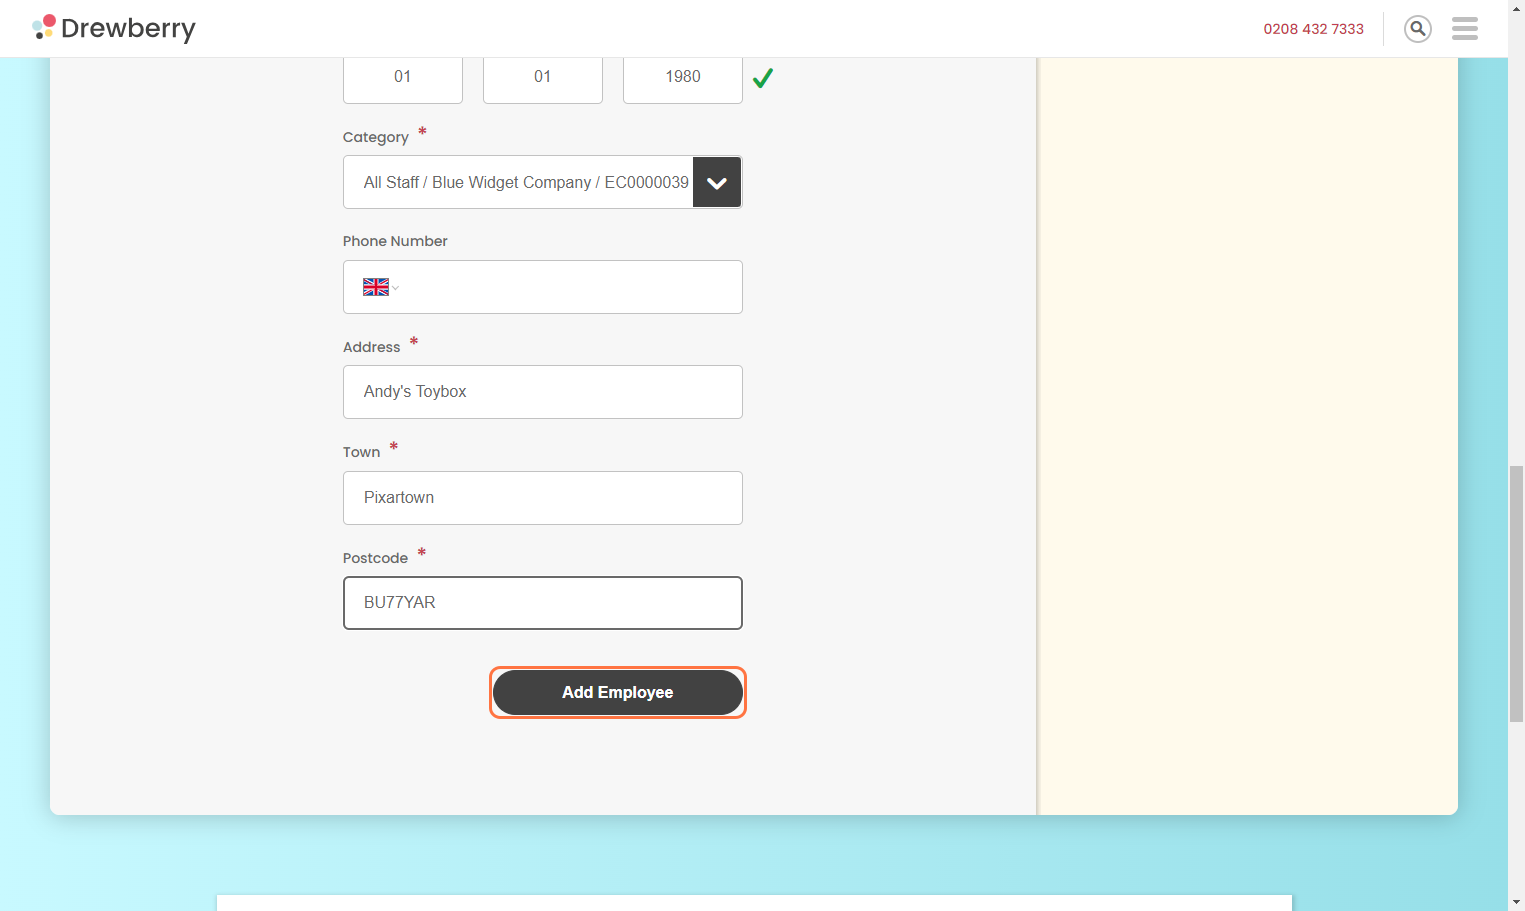
Under the “Add Single Employee” option, you’ll be given a form to fill out with the information we need, such as employment start date, job role, and salary details. Once you’re done, just hit submit!
Upload Successful
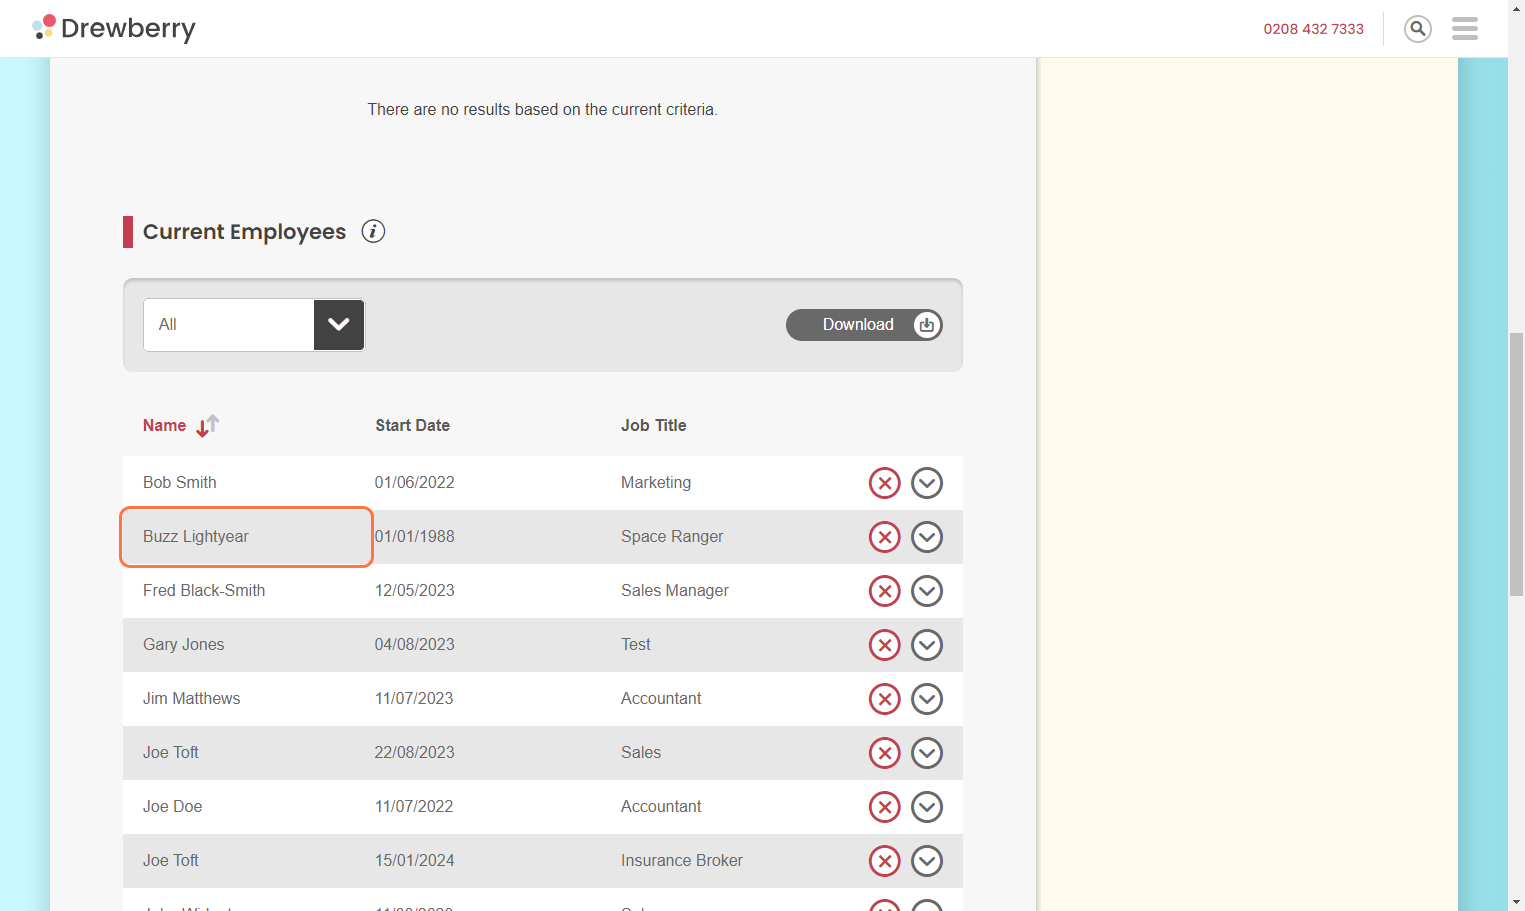
You can now find your newbies with the rest of your team under ”Current Employees”. From here, you’ll be able to make any changes to their record if you need to.
Option B: Bulk CSV Upload
Got a big list of people to add? Don’t worry, it’s easy!
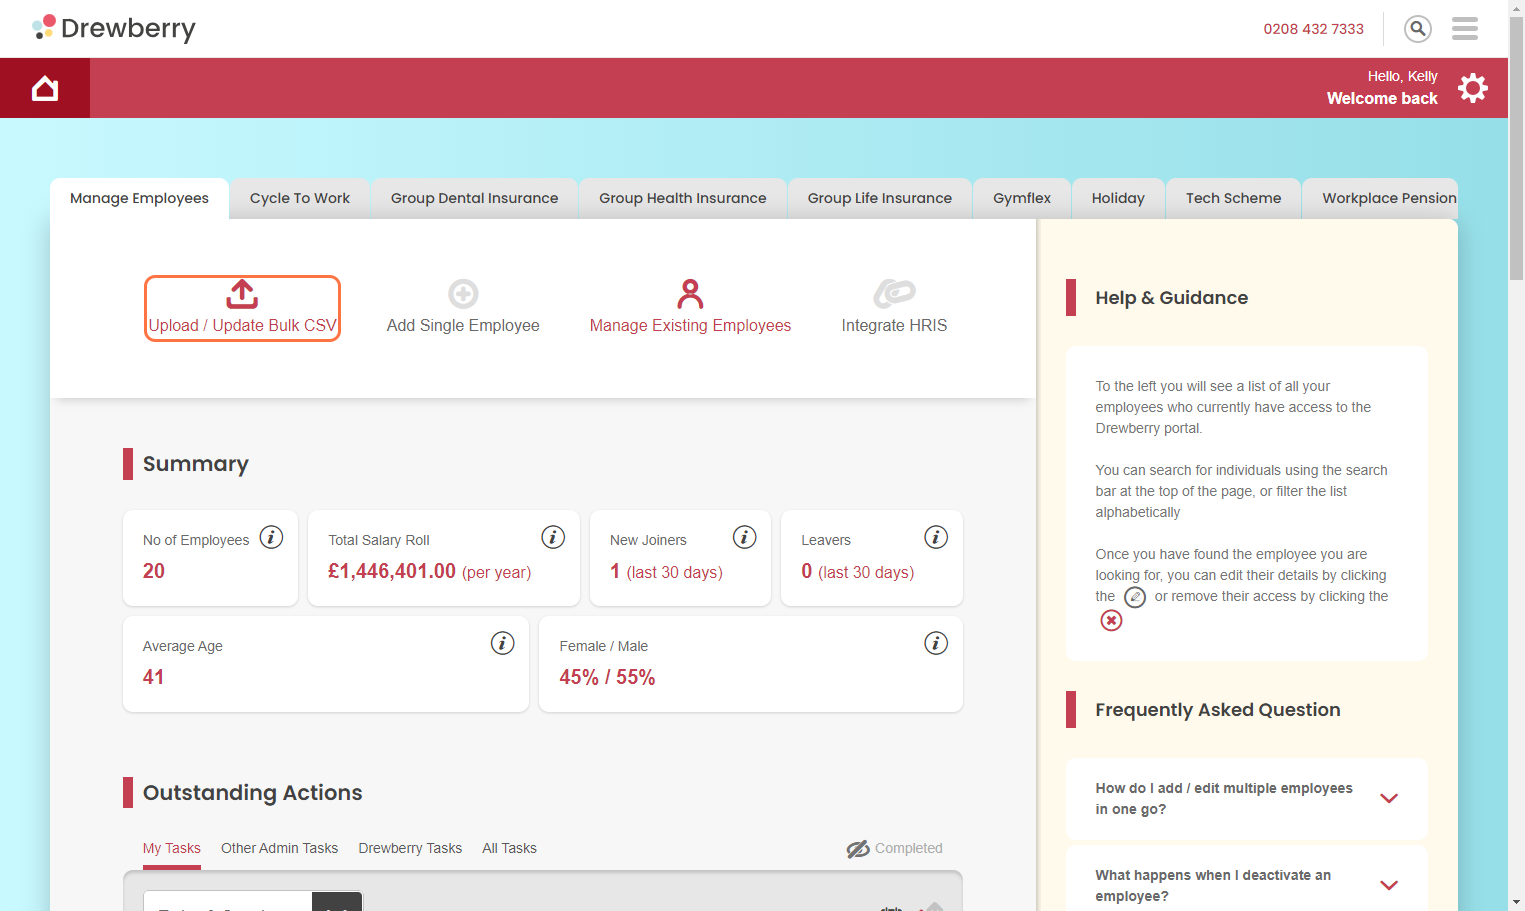
Go To “Manage Employees” and Select “Upload / Update Bulk CSV”
Under the “Manage employees” tab, you’ll see the option to “Upload / Update Bulk CSV”. You’ll then be given the option to upload a CSV file of all the employees you want to add. To make sure the upload goes without a hitch, we’ve provided a template for you.
Psst… if you already have your own spreadsheet, that’s great! Just make sure that you’ve got the following columns populated to ensure a seamless sync: First Name, Last Name, Email Address, Occupation, Salary, Department, Date of Birth, Category.
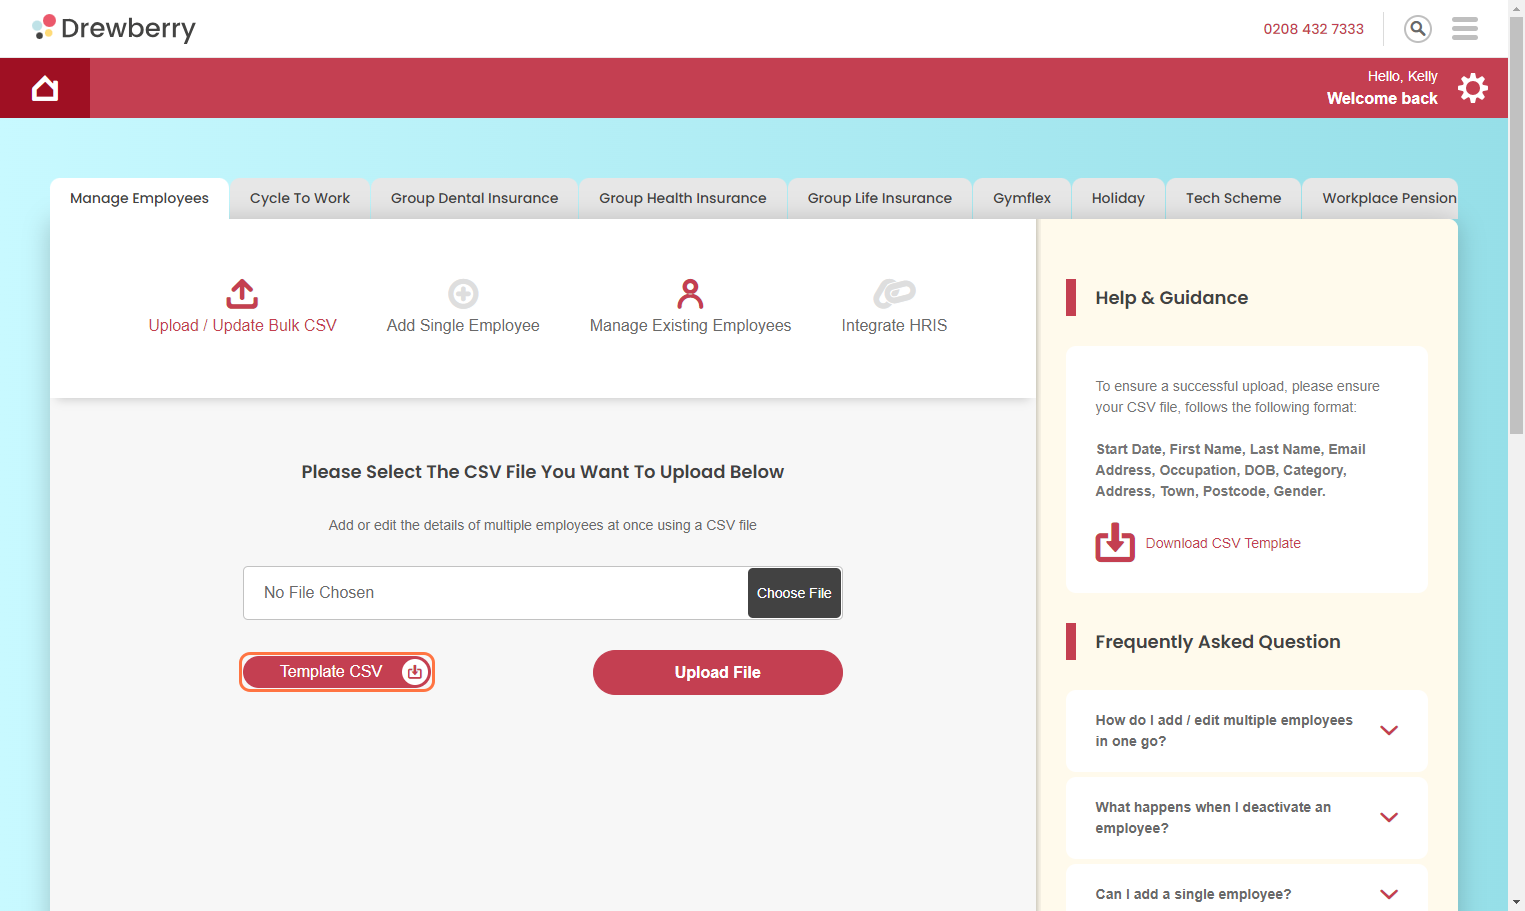
Download The Template CSV
To make sure all the data lines up nicely from our side to yours, employee details need to be in a certain format. That’s where the template CSV comes in. Click the “Template CSV” button and your file will download. Save it somewhere memorable as you’ll be needing to find it soon!
Paste Your List
Open your new download and marvel at its beauty. Now, making sure you keep the headings at the top, paste your employees’ details into the template, making sure everything lines up nicely.

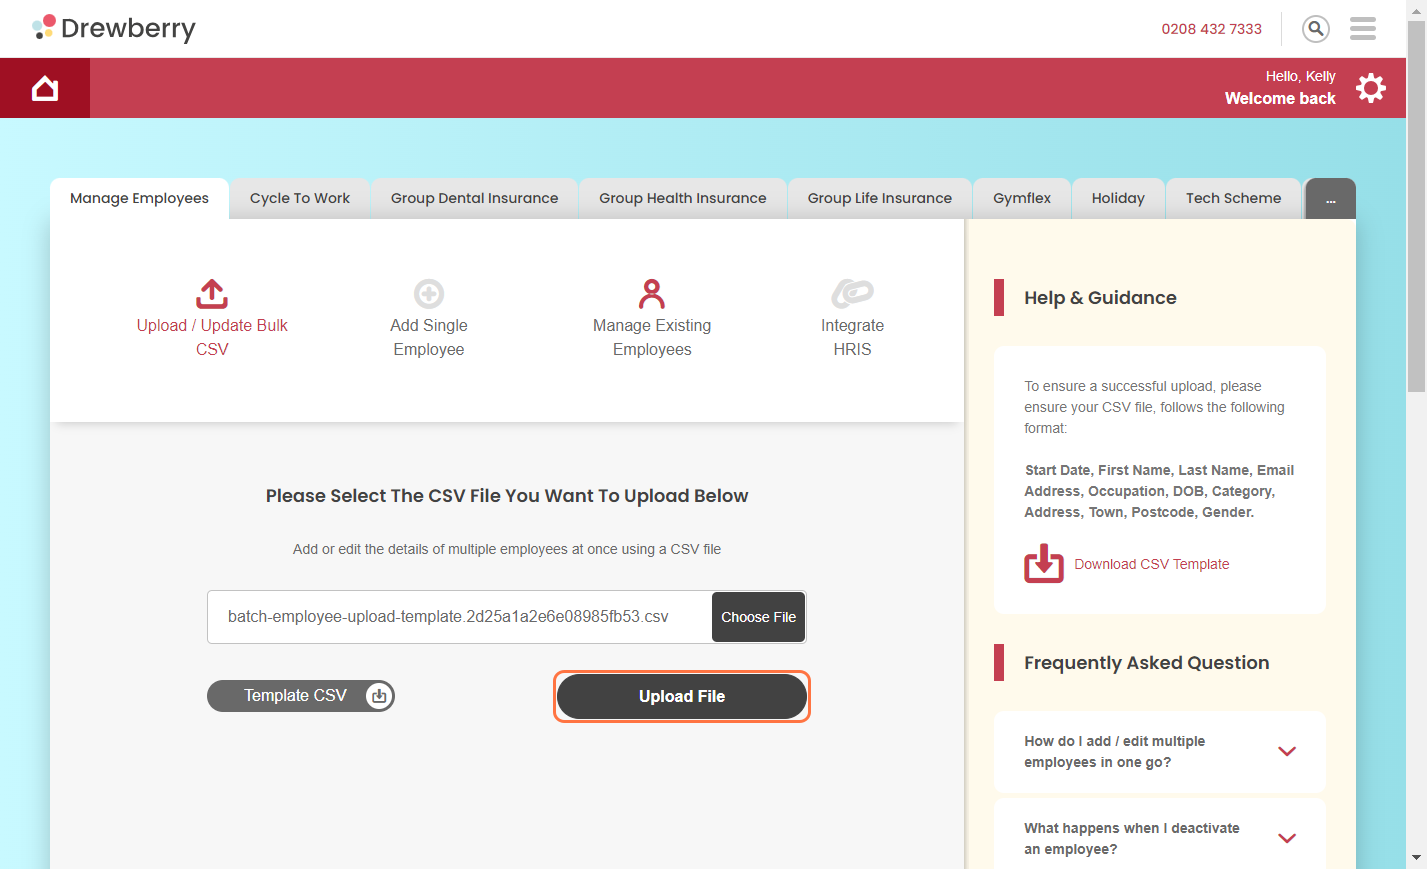
Save And Upload To My.Drewberry
Once the template is filled, save and head back to the portal. Click “Choose File” and select your file from where you saved it. You can then click “Upload File”.
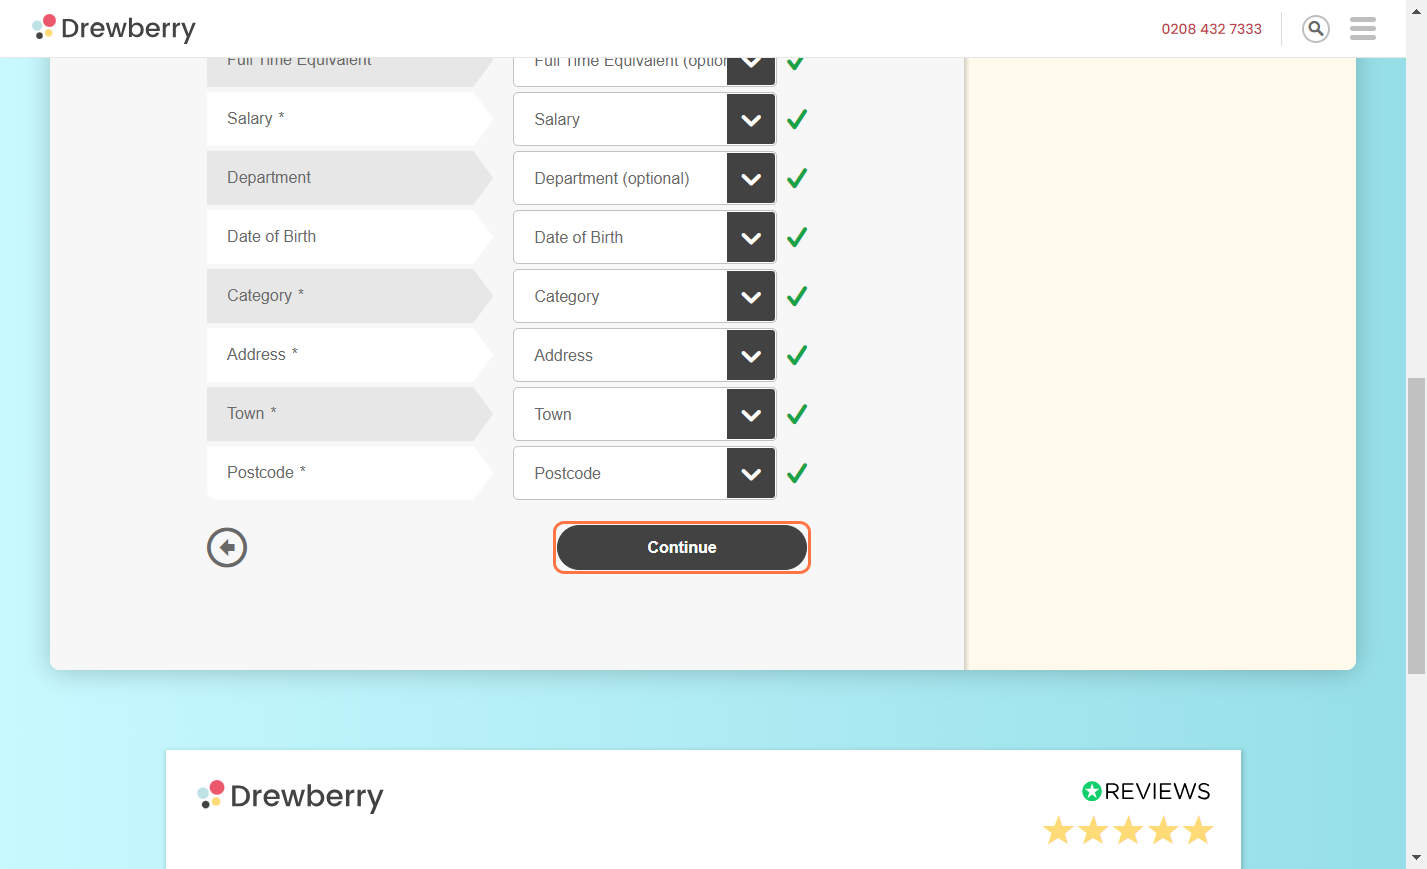
Quick Check On Our Side
After you hit upload, we’ll do a quick check to make sure everything’s aligned and can sync properly. We’ll flag if anything needs amending. If it’s a sea of green ticks, you’re good to continue.
We’ll Start Processing
And you’re done! The My.Drewberry platform will start processing all that yummy data safely and securely. You’ll get an email once it’s done.
Option C: Integrate HRIS
Got an HR system that’s ready to go? Luckily, we play well with others.
See how in 30 seconds
Go To “Manage Employees” And Click “Integrate HRIS”
Under the “Manage employees” tab, you’ll see the option to “Integrate HRIS”.
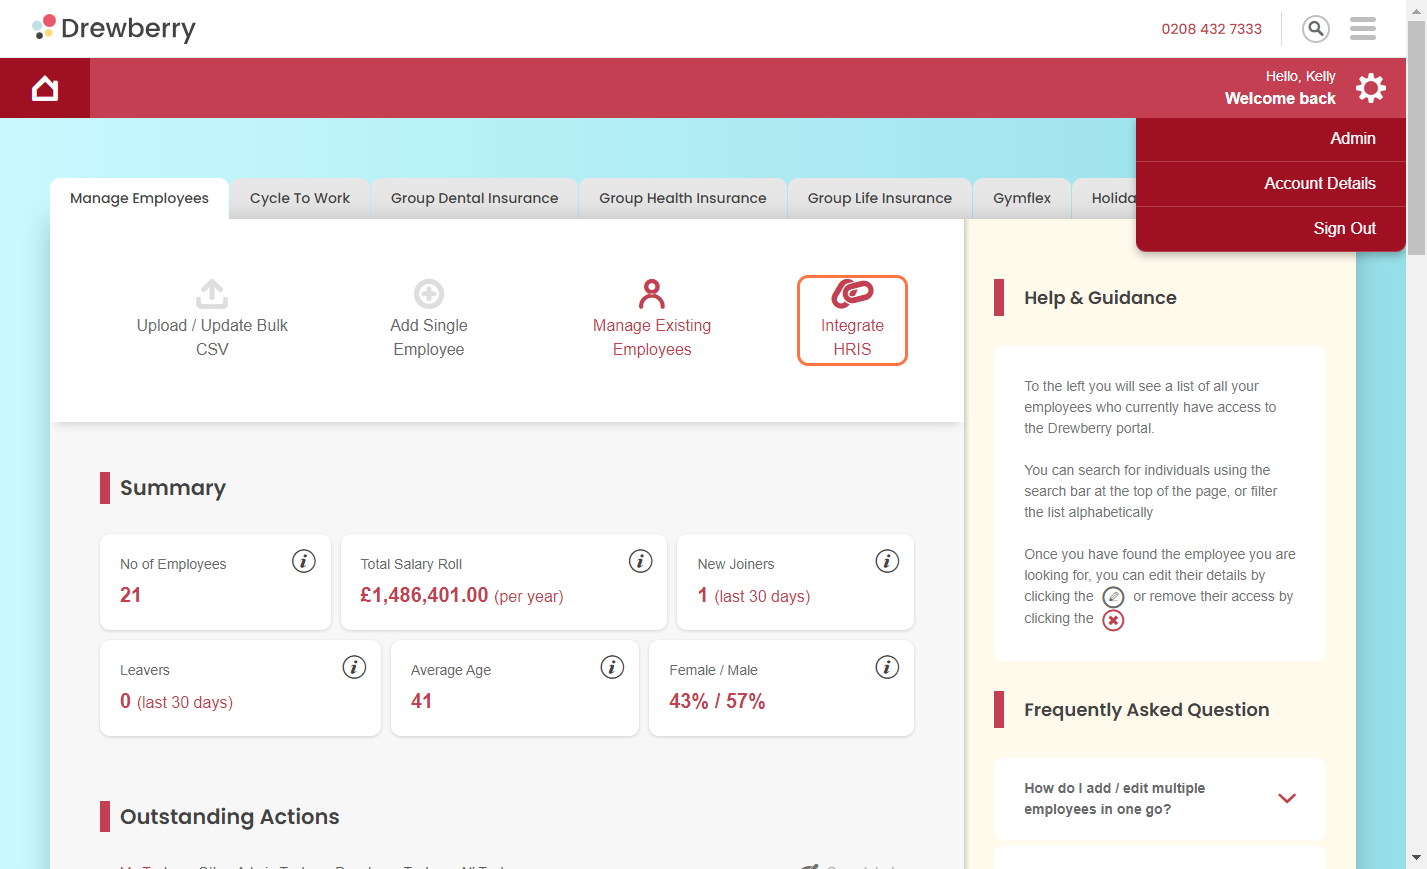
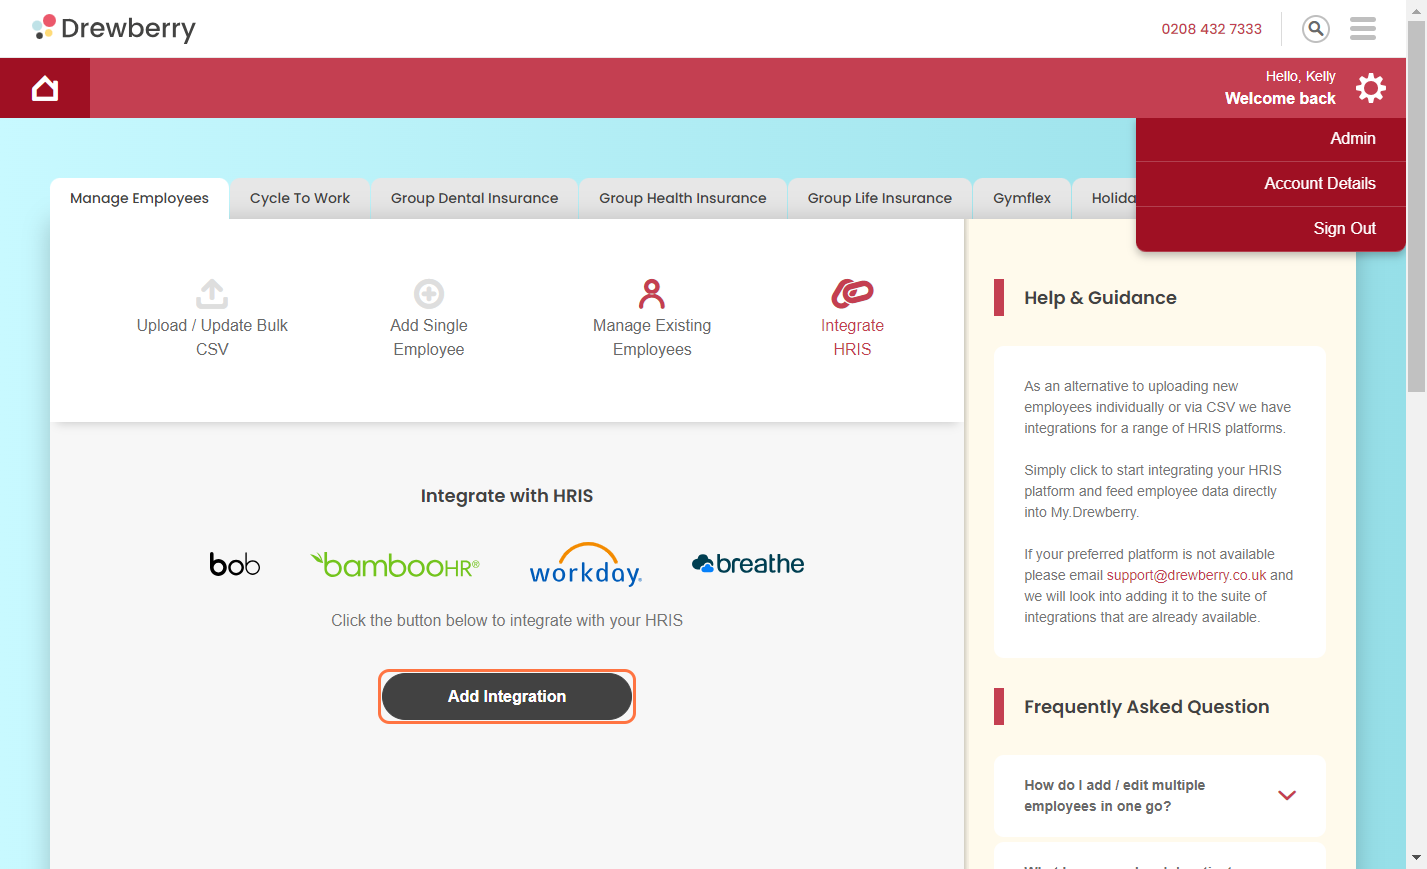
Select “Add Integration” And Sync Your Software
Select the “Integrate HRIS” icon and click “Add Integration”. You can then select your HRIS provider. We work with all the big names, such as BambooHR, Breathe, Hibob, and Workday.
The Technical Stuff
You’ll need some technical details from your HRIS software to unlock the synchronisation. The exact way to get this varies depending on which software system you’re using. We’ve got some prompts on our side, but you should get with your HRIS provider to make sure you’ve got everything you need from them.
For example, you’ll need an API key if you’re using Bamboo, but Workday will need a few more admin details.
Sync Complete
Once you’ve entered the various keys and passwords needed, your sync will be set up and ready to go! That means any changes (new joiners/changes to existing employees/removing leavers) will be automatically fed to My.Drewberry, where employee benefit selections will be updated accordingly. Pretty neat, right?
We get that not everyone’s a tech wiz, so if you need a hand getting My.Drewberry and HRIS to work together, just give our support team a call on [dynamic_number].
Step 3: Approve The Benefits Selection
Now you’ve added your people, there’s just a little bit more admin to do. We call them “Tasks”. But don’t worry, we’ll let you know exactly what’s needed.
Check Your Outstanding Tasks
On your “Manage Employees” tab, you’ll see a section called “Outstanding Actions”. Here you’ll find automatically-generated outstanding tasks directing you to approve your newly-added employees’ benefits.
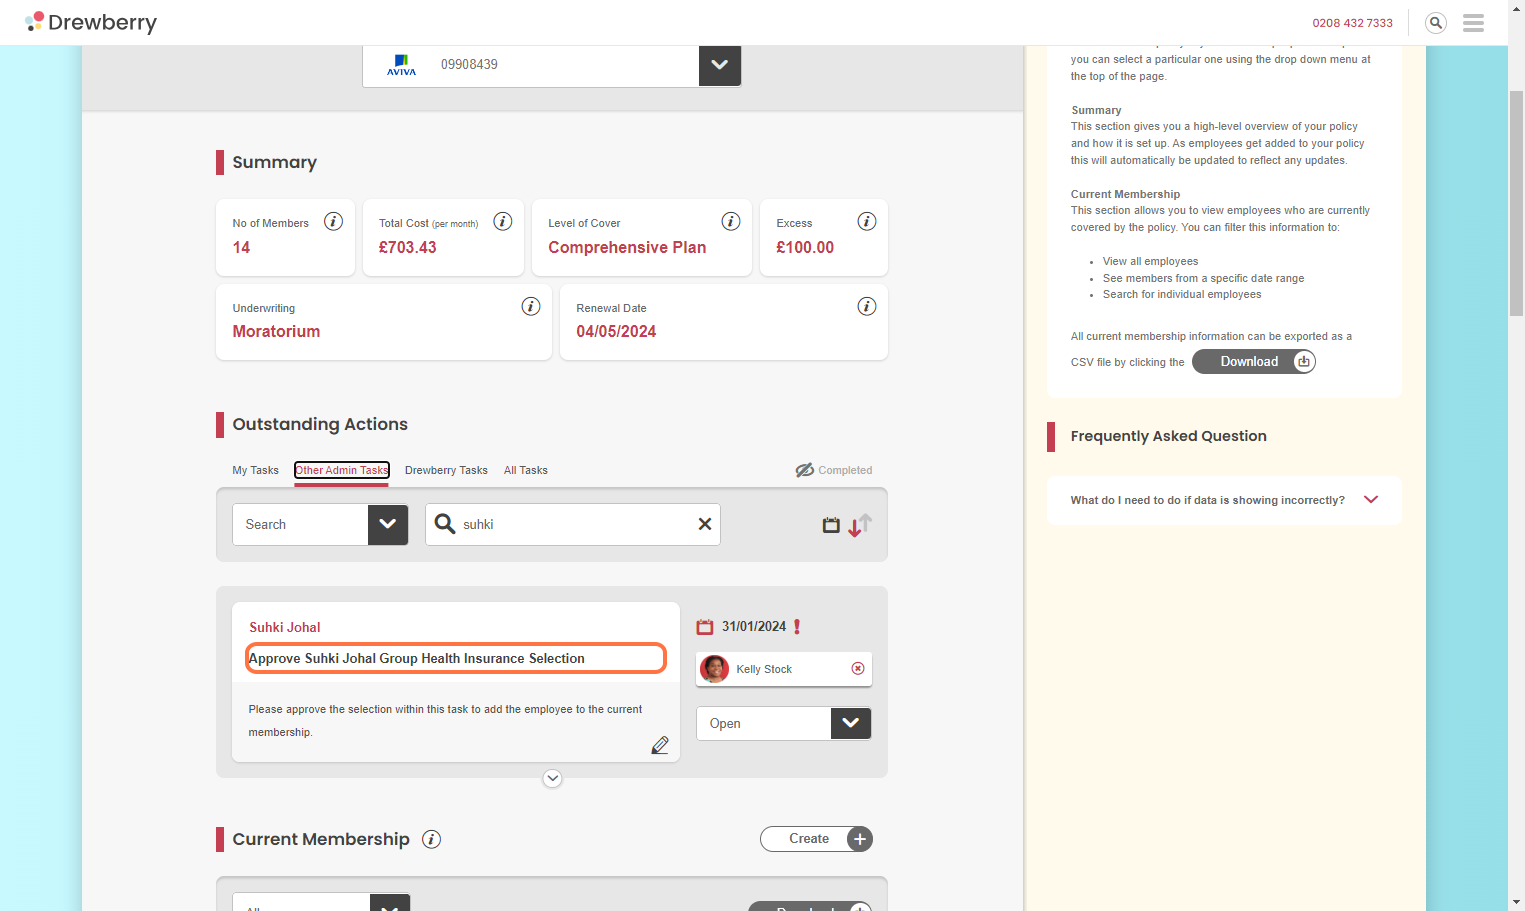
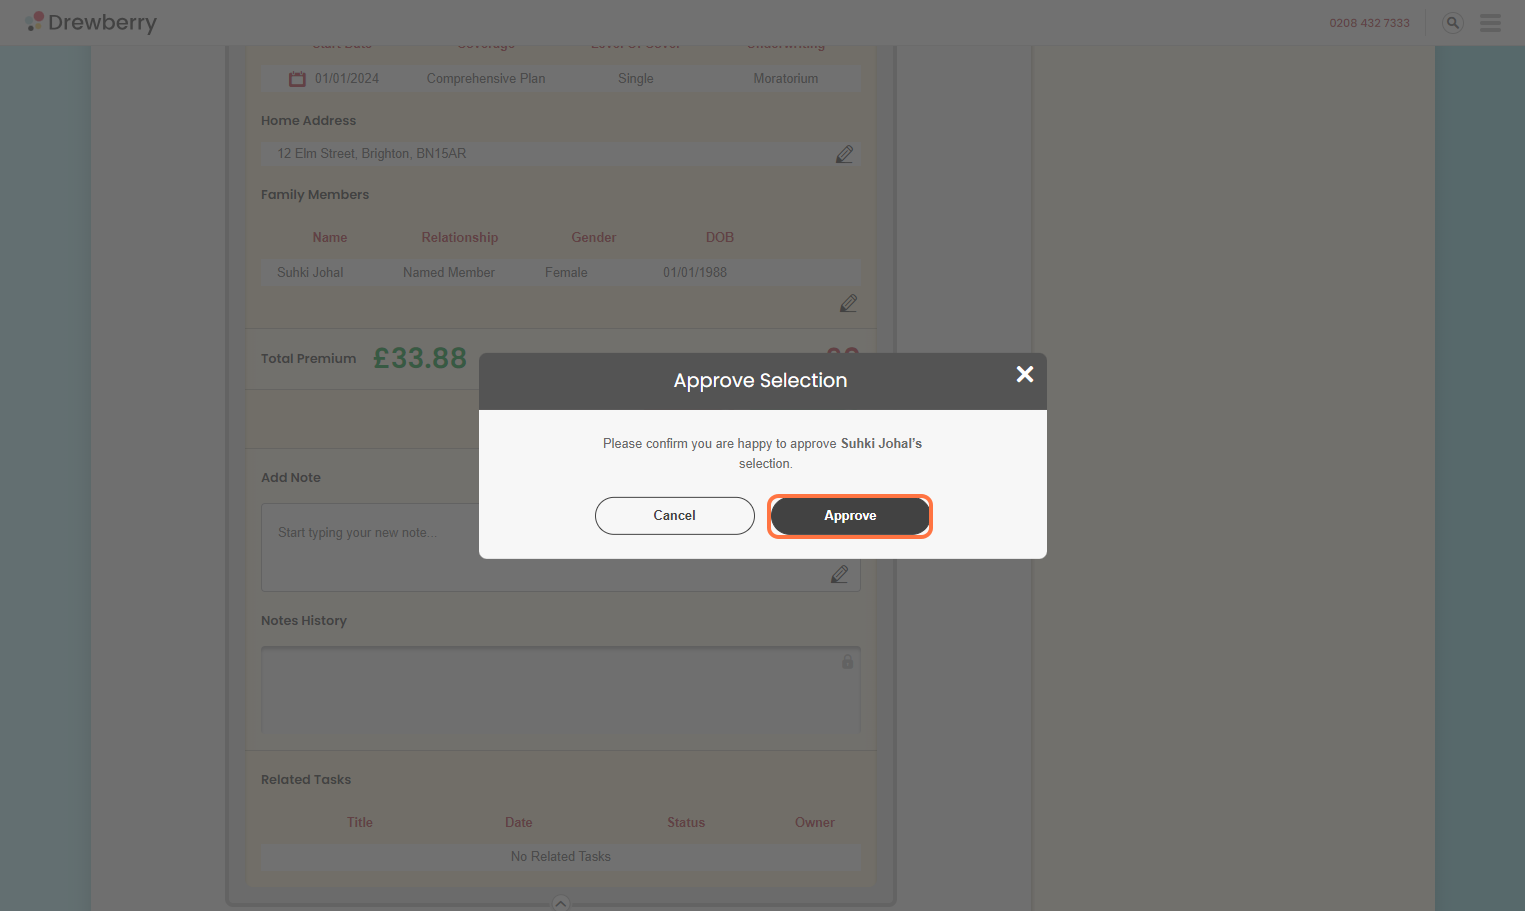
Review and Approve Benefits
Use the down arrow to expand the details and check everything’s hunky dory, then hit approve. This will clear the task. Your employee is now fully onboard the My.Drewberry platform!
We all need a little help sometimes, so if you’re having trouble adding employees to the platform, give our team a call on [dynamic_number].


